Crisp Refrigerator Dill Pickles-Easy & Tangy Recipes
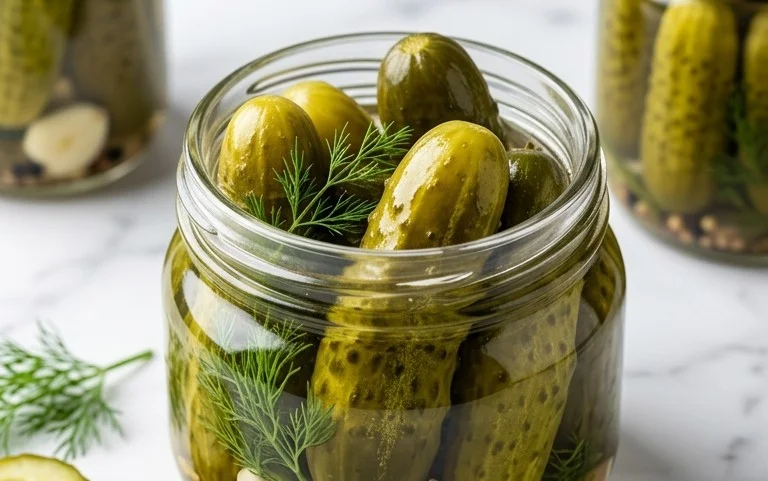
Refrigerator dill pickles are a summer dream, a crunchy, briny burst of flavor that transforms simple cucumbers into something truly magical. Forget those store-bought versions that often leave you wanting more; making your own refrigerator dill pickles at home is surprisingly easy and yields a far superior result. There’s an undeniable satisfaction in pulling a jar of these vibrant green dills from your fridge, knowing you created them yourself. The crisp texture, the zing of dill, the perfect balance of salt and vinegar – it’s a taste that evokes backyard barbecues, picnics in the park, and lazy afternoons. What makes these refrigerator dill pickles so special is their immediacy. Unlike fermented pickles that require weeks, these are ready to enjoy in just a few days, offering instant gratification for your pickle cravings.
Refrigerator Dill Pickles
There’s something incredibly satisfying about pulling a jar of crisp, tangy dill pickles from your refrigerator. Unlike their canned counterparts, these refrigerator pickles offer a delightful crunch and a fresh, vibrant flavor that’s perfect for sandwiches, burgers, or just snacking straight from the jar. The best part? They are remarkably easy to make, requiring no special canning equipment and just a little bit of patience as they chill and the flavors meld. Forget those store-bought versions that can sometimes be mushy or overly vinegary. With this simple recipe, you can create pickles that are perfectly balanced, bursting with dill and garlic, and wonderfully refreshing. I love making a batch of these whenever fresh cucumbers are in season, ensuring I always have a ready supply of this delicious condiment.
Ingredients:
- 3 cups water
- 3/4 cup white vinegar
- 3 tablespoons granulated sugar
- 2 tablespoons kosher salt
- 6 small cucumbers
- 8 sprigs fresh dill
- 4 cloves garlic (peeled and sliced thin)
- 2 tablespoons pickling spice
Instructions:
Let’s get started on creating your own batch of delicious refrigerator dill pickles. The process is straightforward, and the results are incredibly rewarding.
Phase 1: Preparing the Brine
The foundation of any great pickle is a well-balanced brine. In a medium saucepan, combine the 3 cups of water, 3/4 cup of white vinegar, 3 tablespoons of granulated sugar, and 2 tablespoons of kosher salt. Bring this mixture to a gentle boil over medium heat, stirring occasionally until the sugar and salt are completely dissolved. Once dissolved, remove the saucepan from the heat and let the brine cool slightly. It doesn’t need to be completely cold, but you don’t want it boiling hot when it comes into contact with the cucumbers and other aromatics.
Tip: Using kosher salt is recommended because it has larger, flakier crystals that dissolve well and don’t contain anti-caking agents that can make your brine cloudy. White vinegar provides the necessary acidity for preservation and that classic pickle tang. Feel free to adjust the sugar slightly to your preference, but this amount strikes a nice balance between sweet and sour.
Phase 2: Assembling the Pickles
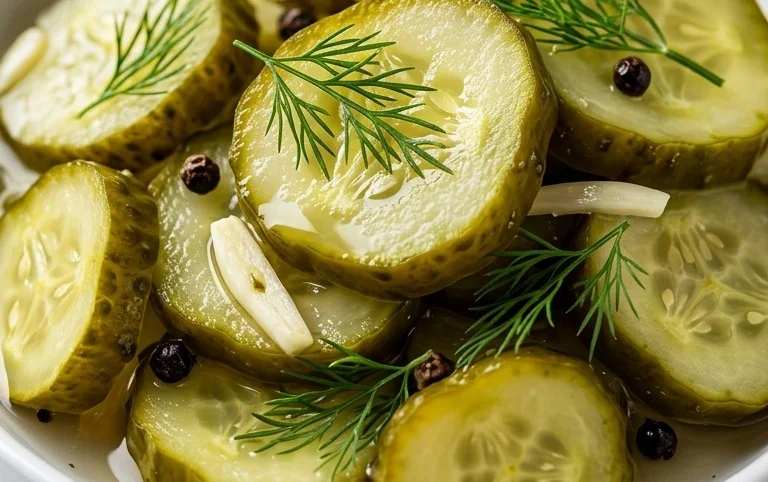
While the brine is cooling, it’s time to prepare your cucumbers and aromatics. Wash the 6 small cucumbers thoroughly. For refrigerator pickles, you can leave the skins on for added texture and color, or you can peel them if you prefer a softer skin. Slice the cucumbers into your desired thickness – typically about 1/4 inch rounds or spears. If you’re using larger cucumbers, you might want to remove the seedy core, but with small pickling cucumbers, this is usually not necessary. Distribute the 8 sprigs of fresh dill and the 4 cloves of garlic, peeled and sliced thinly, among your clean jars. I like to use pint-sized or quart-sized mason jars for this. Divide the dill and garlic evenly between the jars. This layering of aromatics will infuse the pickles with their signature flavor as they pickle.
Tip: If you don’t have fresh dill sprigs, you can use about 1 tablespoon of dried dill weed per jar, but fresh dill truly provides the best flavor. For the garlic, slicing it thinly allows its flavor to permeate the brine more effectively. You can also add other spices at this stage if you like, such as a few mustard seeds or peppercorns, but the pickling spice blend will handle a lot of that complexity.
Phase 3: Packing the Jars and Brining
Now, carefully pack the sliced cucumbers into the jars, arranging them snugly but without crushing them. Try to get as many cucumber slices in as possible. Once the jars are filled with cucumbers, sprinkle about half a tablespoon of the pickling spice blend over the cucumbers in each jar. This will add another layer of aromatic flavor. Next, carefully pour the slightly cooled brine over the cucumbers and aromatics, making sure to cover them completely. Leave about a 1/2 inch of headspace at the top of each jar. This headspace is important for proper sealing, even though these are not shelf-stable pickles.
Tip: Ensure the brine completely submerges the cucumbers. If you find you don’t have quite enough brine, you can quickly whip up a bit more by following the brine ratio (about 4 parts water to 1 part vinegar, with salt and sugar). Gently tap the jars on the counter a few times after filling with brine to release any trapped air bubbles, then top up with brine if needed.
Phase 4: Chilling and Flavor Development
Once the jars are filled with brine and sealed tightly with their lids, it’s time for the magic to happen in the refrigerator. Place the jars upright in the refrigerator. The pickles will need at least 24 to 48 hours to chill and for the flavors to fully develop. While you can certainly taste them after 24 hours, I find that they are truly at their best after a full 48 hours. During this time, the cucumbers will absorb the tangy brine, and the dill and garlic will infuse them with their delicious essence, transforming them into crisp, flavorful pickles.
Tip: The longer these pickles sit in the refrigerator, the more intense the flavors will become. They will keep for several weeks in the refrigerator, so don’t be afraid to make a larger batch if you have the space! They are perfect for impromptu gatherings or just having on hand for your favorite meals.
Phase 5: Enjoying Your Homemade Pickles
After at least 24-48 hours of chilling, your delicious refrigerator dill pickles are ready to be enjoyed! Pull them out of the fridge and marvel at their vibrant green color and the tantalizing aroma. Drain off some of the brine if you prefer, or serve them with a little brine still clinging to them. These pickles are incredibly versatile. They make a fantastic addition to any sandwich or burger, offering a burst of acidity and crunch. Chop them up for potato salad or tuna salad to add a zesty twist. Or, simply grab a fork and enjoy them as a healthy, satisfying snack. The crisp texture and tangy, dilly flavor are sure to impress. Happy pickling!
Conclusion:
You’ve now unlocked the secret to wonderfully crisp and tangy Refrigerator Dill Pickles! This recipe is a true winner because it’s incredibly simple, requires no special equipment, and delivers that satisfying crunch and bright dill flavor we all love. Forget those soggy store-bought versions; these homemade pickles are a testament to how easy and rewarding it is to make your own. They are a fantastic addition to almost any meal, elevating everything from sandwiches and burgers to charcuterie boards and salads. Don’t be afraid to get creative with your additions – a touch of garlic, some peppercorns, or a hint of mustard seed can completely transform the flavor profile. I truly encourage you to gather your ingredients and give this recipe a try. You’ll be amazed at how quickly you can transform fresh cucumbers into a delicious pantry staple that you’ll want to make again and again.
Frequently Asked Questions:
How long do these refrigerator dill pickles last?
Stored properly in the refrigerator, these pickles should stay fresh and delicious for about 2-3 weeks. Make sure they are always submerged in their brine.
Can I use different types of cucumbers?
Absolutely! While Kirby cucumbers are ideal for pickling due to their firm flesh and small seeds, you can also use Persian or English cucumbers. Just be aware that larger cucumbers might have more seeds and a slightly softer texture. For the best results, choose fresh, firm cucumbers.
What if my pickles aren’t crisp enough?
Cucumber crispness can be tricky! Ensure you’re using fresh, firm cucumbers. Some people find adding a grape leaf or a piece of horseradish root to the jar helps maintain crispness. Also, make sure your brine is the correct temperature when you pour it over the cucumbers.
Refrigerator Dill Pickles
Quick and easy refrigerator dill pickles, perfect for a crisp and tangy snack. No canning required!
Ingredients
-
3 cups water
-
3/4 cup white vinegar
-
3 tablespoons granulated sugar
-
2 tablespoons kosher salt
-
6 small cucumbers
-
8 sprigs fresh dill
-
4 cloves garlic, peeled and sliced thin
-
2 tablespoons pickling spice
Instructions
-
Step 1
Wash cucumbers thoroughly and trim off the blossom end. Cut cucumbers into desired shapes (spears, slices, or whole). -
Step 2
In a medium saucepan, combine water, white vinegar, granulated sugar, and kosher salt. Bring to a simmer over medium heat, stirring until salt and sugar are dissolved. -
Step 3
In a clean 1-quart jar, place 4 sprigs of fresh dill and half of the sliced garlic cloves at the bottom. -
Step 4
Pack the prepared cucumbers tightly into the jar. -
Step 5
Add the remaining 4 sprigs of dill and sliced garlic on top of the cucumbers. Sprinkle with pickling spice. -
Step 6
Carefully pour the hot brine over the cucumbers, ensuring they are fully submerged. Leave about 1/2 inch of headspace at the top. -
Step 7
Seal the jar tightly and let it cool to room temperature. Then, refrigerate for at least 24 hours before serving. Pickles will be best after a few days.
Important Information
Nutrition Facts (Per Serving)
It is important to consider this information as approximate and not to use it as definitive health advice.
Allergy Information
Please check ingredients for potential allergens and consult a health professional if in doubt.